In this post, I shortly describe how to install Docker on Raspberry Pi 4 running Raspian Buster. There are many tutorials available describing the process, but I faced always an error when trying to install Docker on my Raspberry Pi 4. So I share here how I got Docker finally installed.
1. Update & Upgrade
As always, first, update and upgrade the system before installing some new packages on Raspberry Pi.
sudo apt-get update
sudo apt-get upgrade
2. Setup Debian to use the legacy iptables
When I tried to follow this tutorial to install Docker on my Raspberry Pi I ran always in an error, where the Docker engine could not be started. The output was similar to that:
dpkg: error processing package docker-ce (--install):
installed docker-ce package post-installation script subprocess returned error exit status 1
When I checked the status of docker.service with
systemctl status docker.service
I got the following error message:
Jul 10 12:08:53 raspberrypi systemd[1]: docker.service: Start request repeated too quickly.
Jul 10 12:08:53 raspberrypi systemd[1]: docker.service: Failed with result 'exit-code'.
Jul 10 12:08:53 raspberrypi systemd[1]: Failed to start Docker Application Container Engine.
I found a very useful hint in a forum from fred727, he wrote: “For me, it was because the docker installer uses iptables for nat. Unfortunately, Debian uses nftables. You can convert the entries over to nftables or just setup Debian to use the legacy iptables”
To do this run the following two commands:
sudo update-alternatives --set iptables /usr/sbin/iptables-legacy
sudo update-alternatives --set ip6tables /usr/sbin/ip6tables-legacy

3. Install Docker using installation script
Download the script:
curl -fsSL https://get.docker.com -o get-docker.sh
Run the script:
sudo sh get-docker.sh
4. Add user pi to the Docker Group
By default, only users with administrative rights (root users) can run containers. If you are not logged in as root, one option is to use the sudo prefix.
However, you could also add your non-root user to the Docker group, which allows him to run Docker commands.
This command adds the default user pi to Docker group:
sudo usermod -aG docker pi
To apply the change, the user must be logged out once and logged in again.
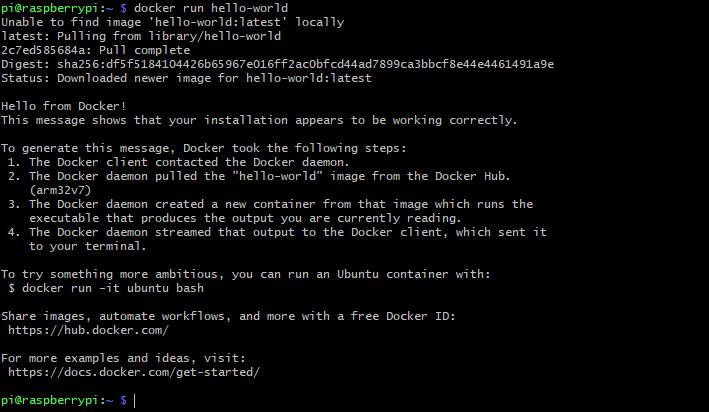
5. Test Docker installation
To test if Docker is installed properly you can run the hello world container with following command:
docker run hello-world
The software contacts the Docker daemon, pulls the “hello-world” image and creates a new container based on that image. After it goes through all the steps, the output should inform you that your installation seems to be working correctly.
References
https://phoenixnap.com/kb/docker-on-raspberry-pi


1 Comment
1TE · 29/09/2021 at 18:57
the iptables did it for me too.
Thanks